In this tutorial, we'll show how you can integrate with any REST api into your monday.com boards using an app called Data Importer.
Install the Data Importer app for monday.com
-
You can install the Data Importer app from the monday.com app marketplace.
-
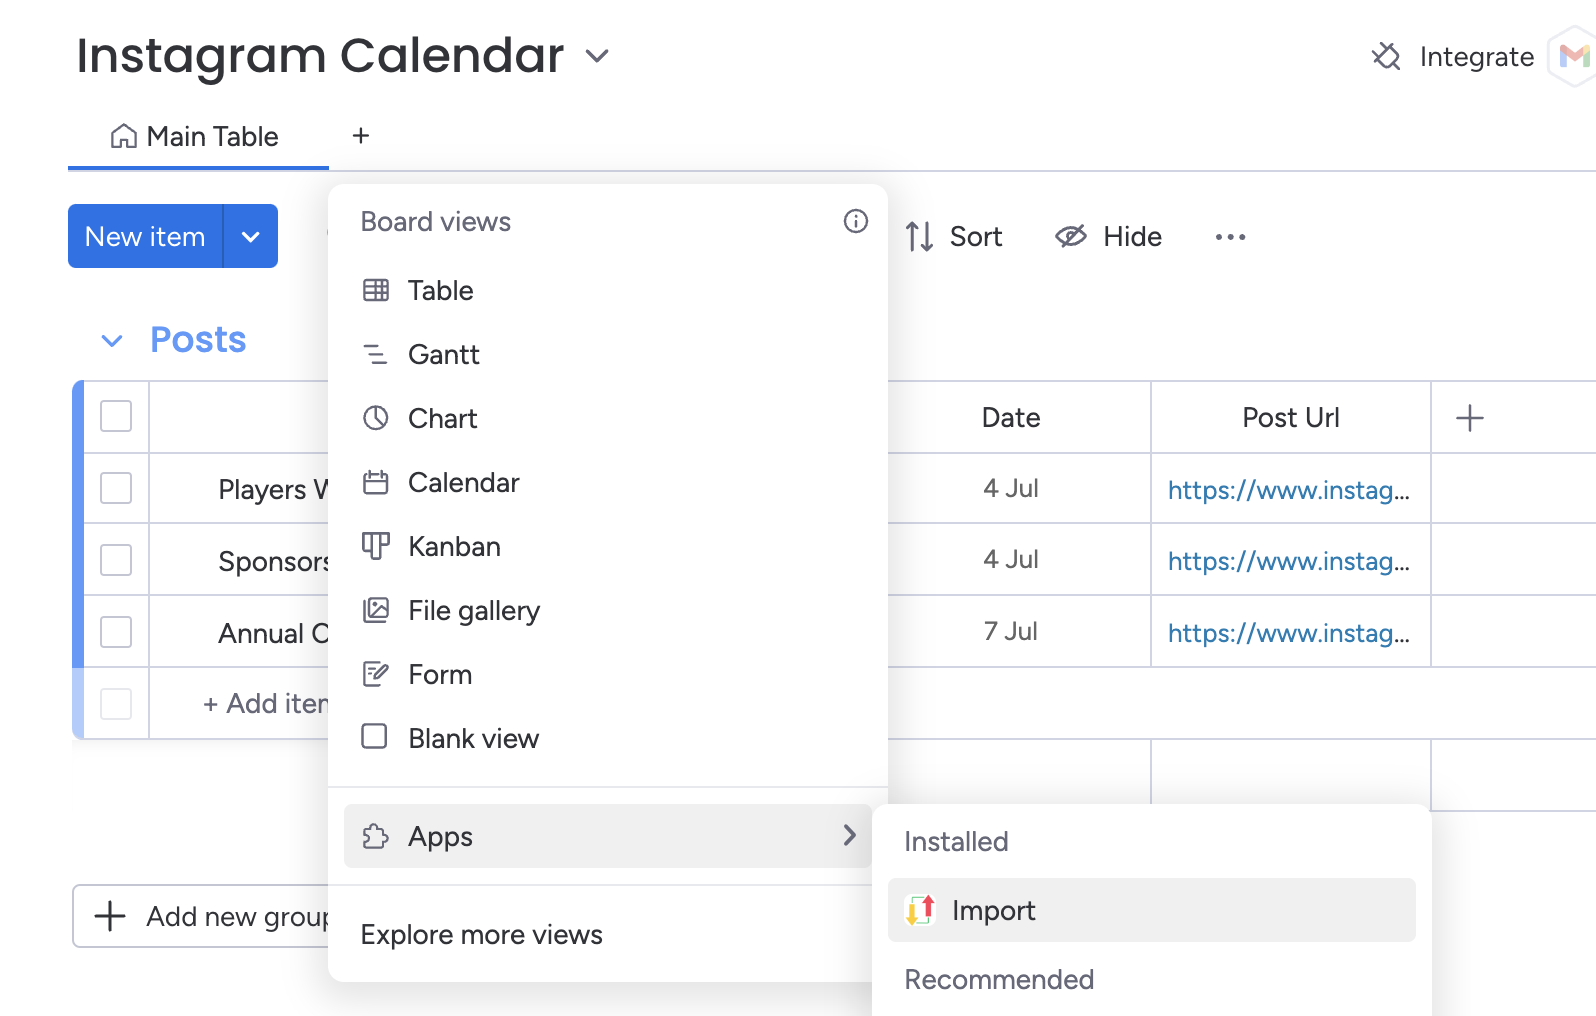
Once you’ve installed the app, you can return back to your board, then press then press the add view button.
-
Select the ‘Board views’ dropdown, press ‘Apps’ then select the ‘Data Importer’ app. This will load a new board view with the Data Importer app.
Set-up your Custom API request
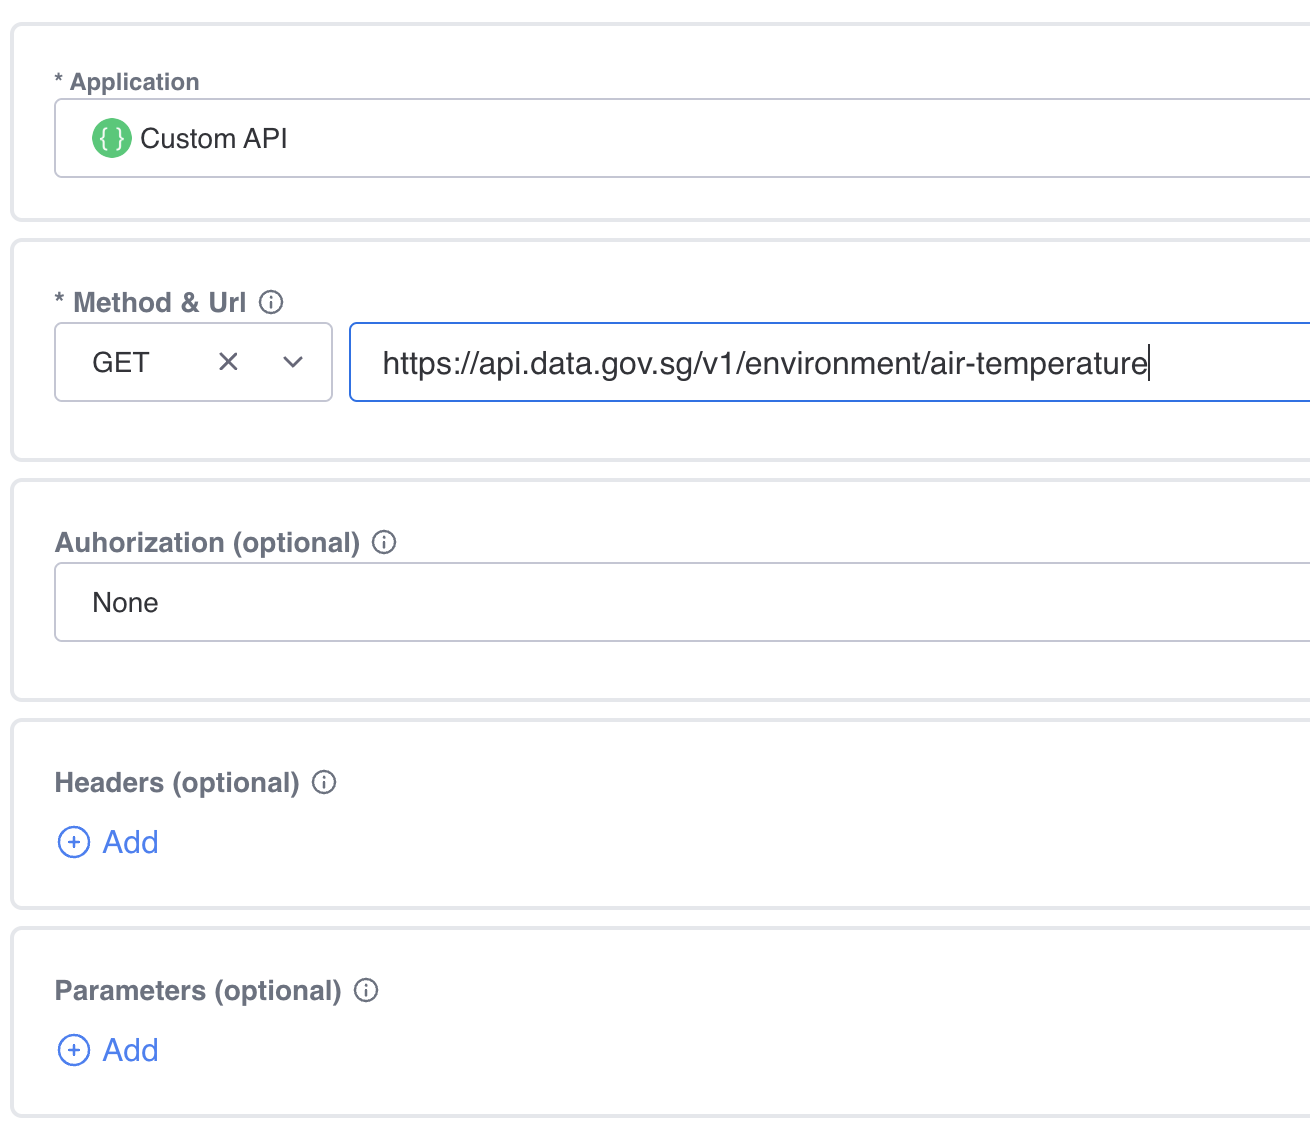
Method: Whether you want to make a GET or POST request. Most APIs for fetching data use a GET request, but refer to your API documentation if unsure.
Url: The web address where you send your request to interact with the API. I
Authorization: If your API requires a key, this is where you provide it.
Parameters: Extra information you send with your request to specify what exactly you want from the API.
Headers: Additional information sent with your request that tells the API how to handle your request.
Body: The main content of your request, typically used when sending data to the API (like in a POST request
Press Run and View Your Data
-
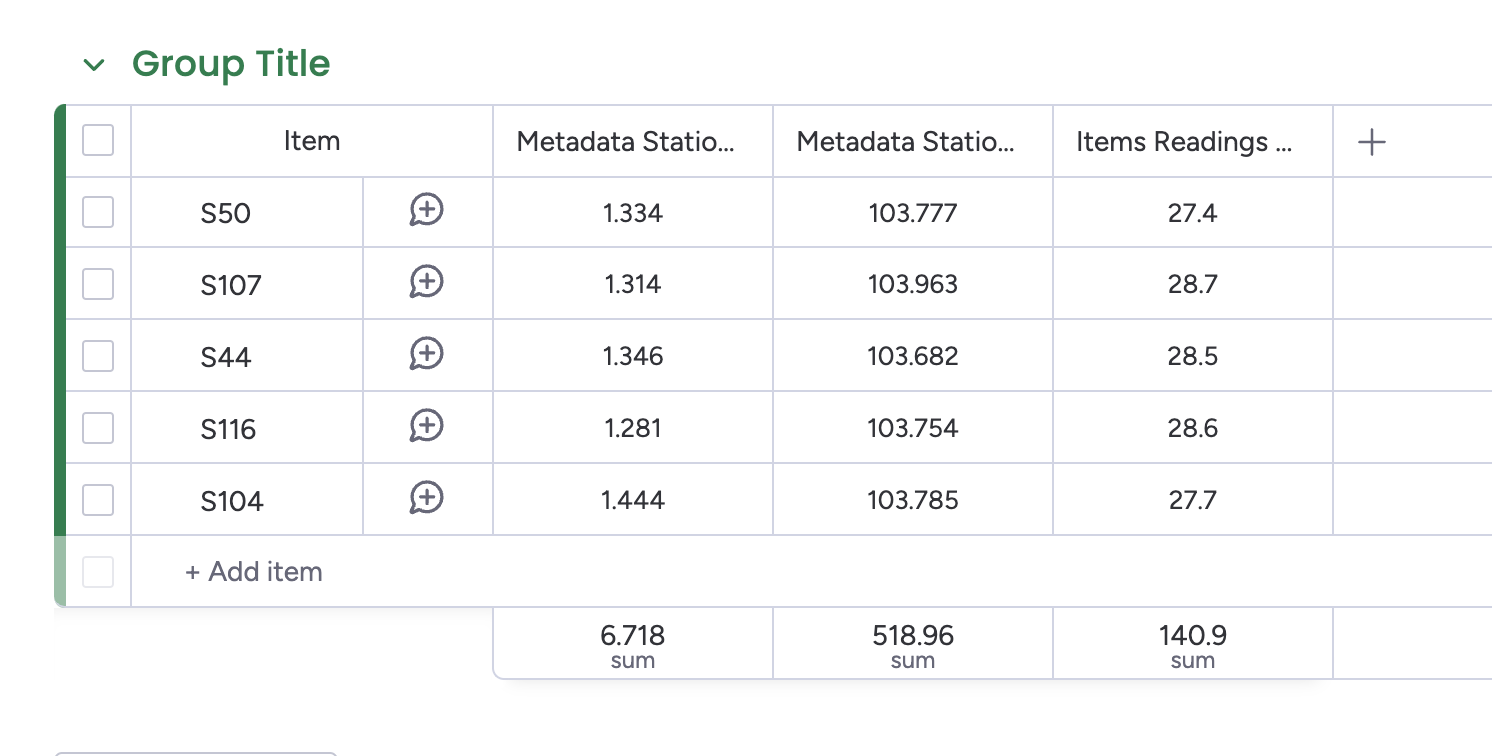
Once you’ve filled out all the required fields, press the blue Run button.
-
When the run is complete, press the button to view the board. You’ll see a new board created called 'Custom Request' which will contain your imported columns
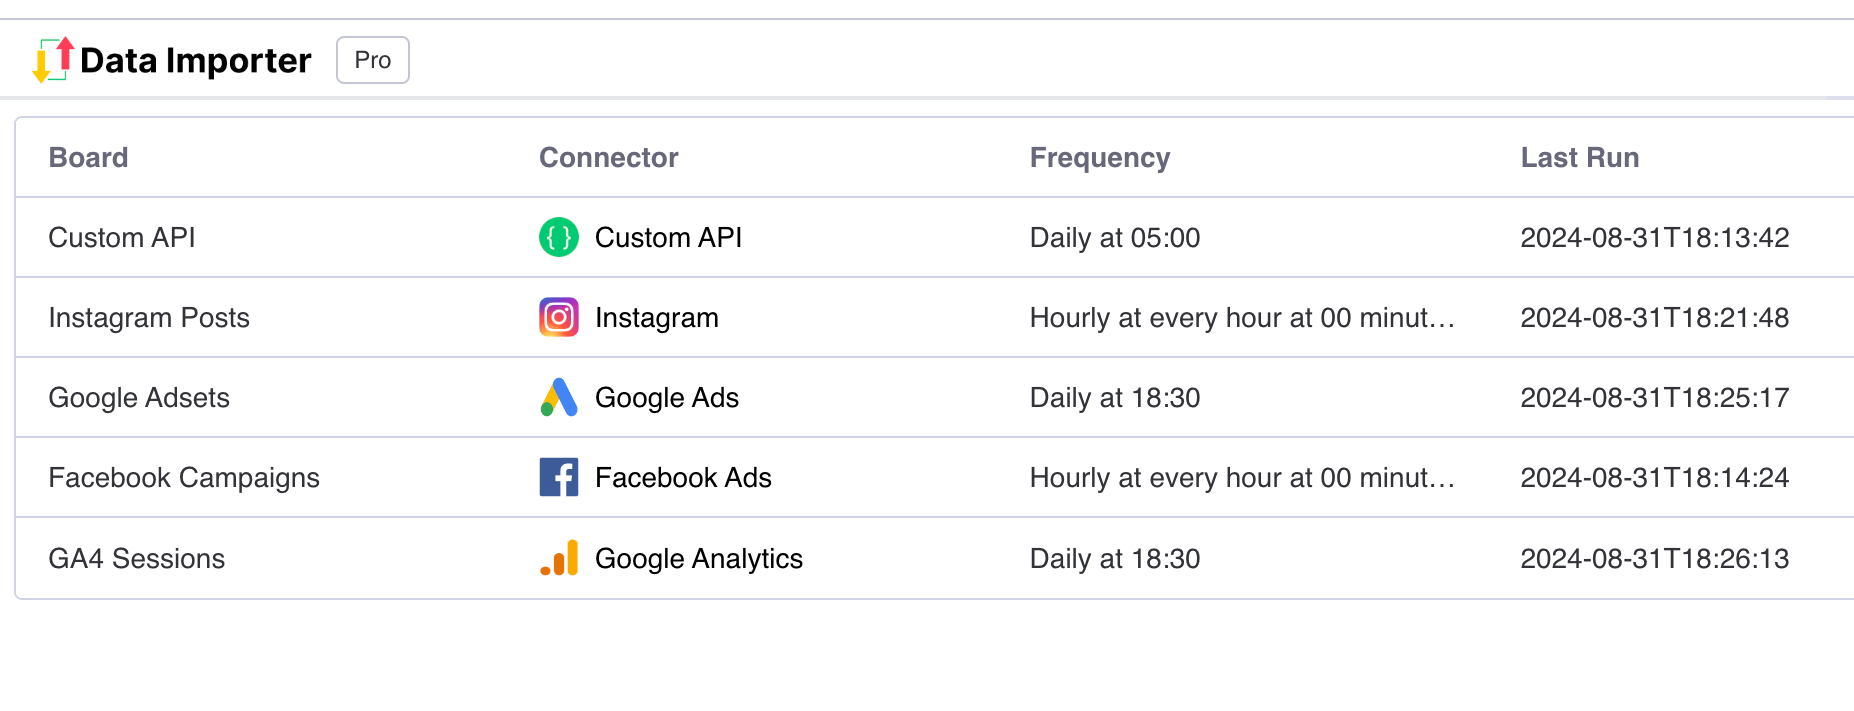
Automatically Integrate your API with monday.com
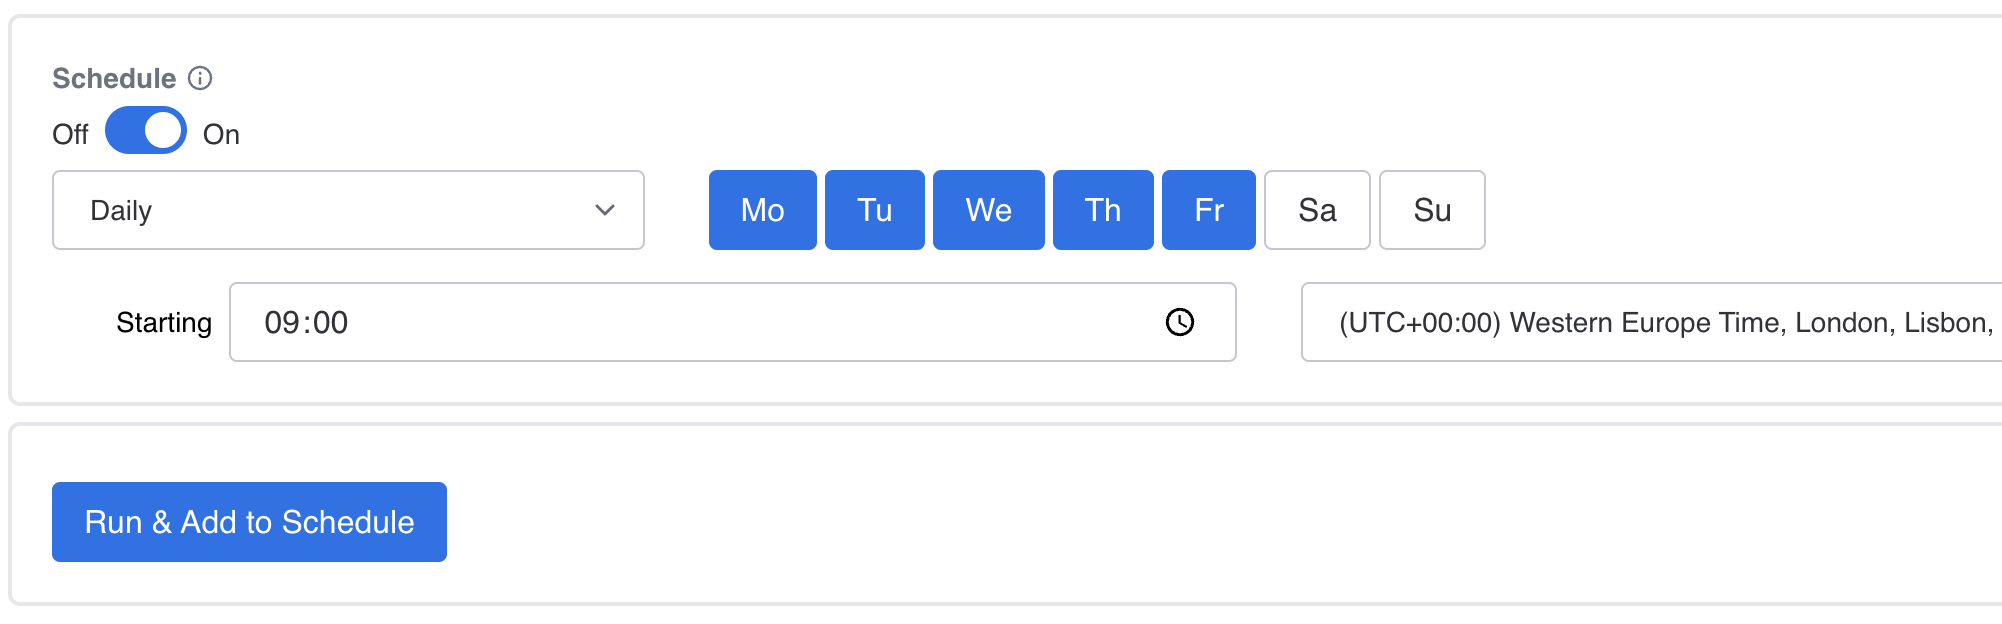
Now that you know how to import Custom API data into monday.com, you can automate your imports by using Data Importer's scheduler. This means your boards will automatically refresh with the latest data, even when you're offline or not signed into monday.com
You can customise the schedule by frequency, days of import, time and timezone.
You can view all your scheduled imports in one table from all of your applications.