In this tutorial, we'll be setting up an integration with excel and monday.com to import rows in excel as monday subitems in your board.
Using the Data Importer app, you will be able to import excel rows into subitems across many subitems in your board.
You can also follow the exact same steps for other spreadsheets/flat files including Google Sheets, CSV or Sharepoint Excel.
Install the Data Importer app for monday.com
-
You can install the Data Importer app from the monday.com app marketplace.
-
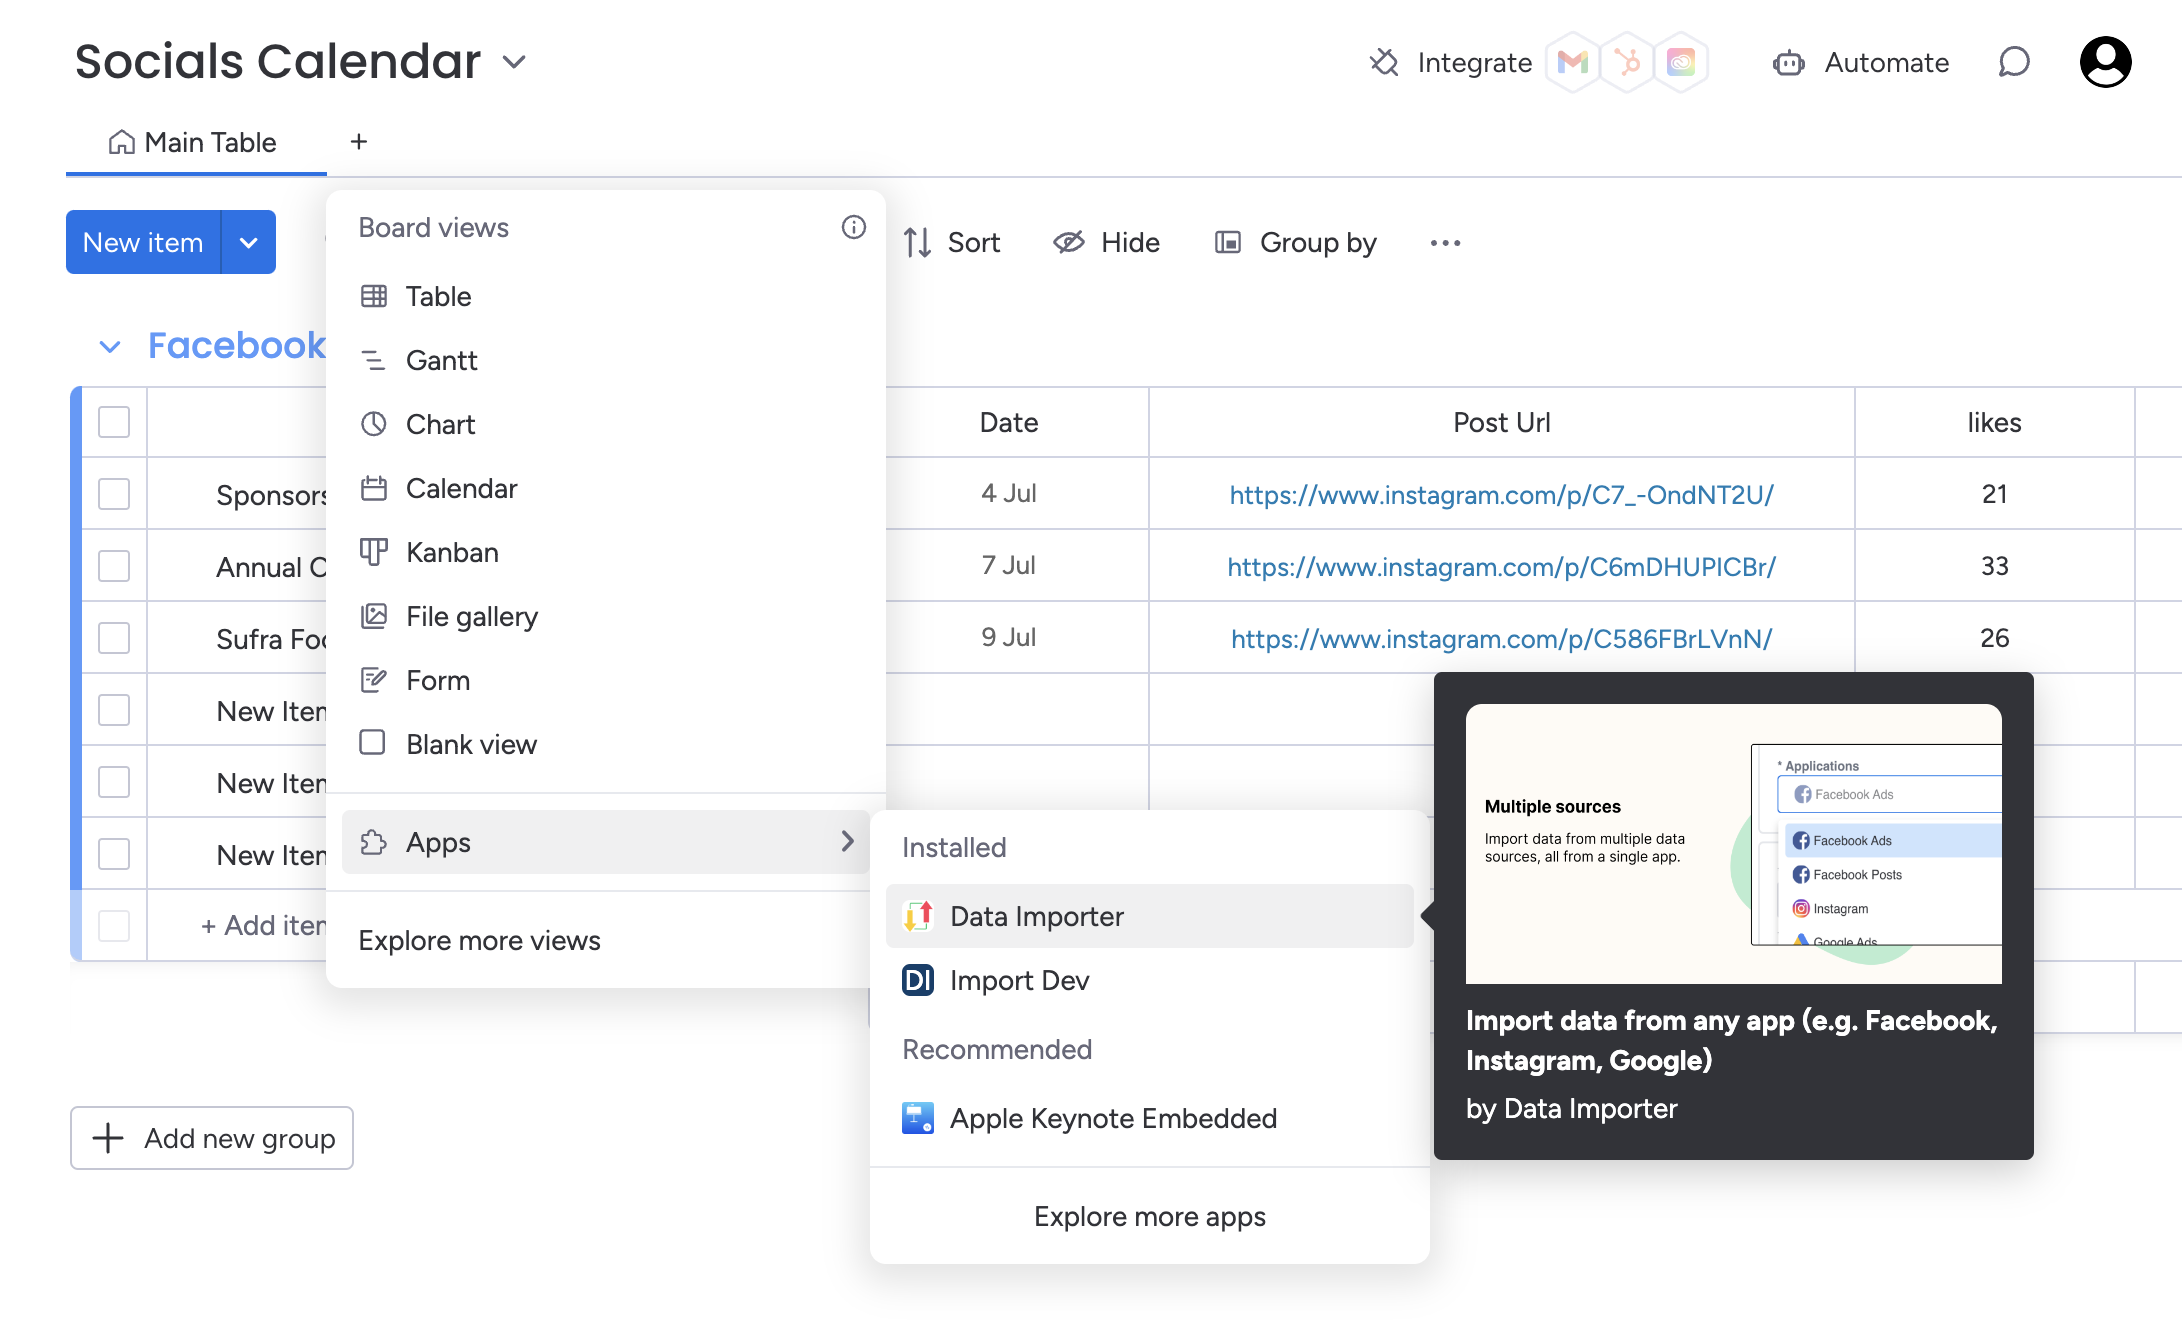
Once you’ve installed the app, you can return back to your board, then press then press the add view button.
-
Select the ‘Board views’ dropdown, press ‘Apps’ then select the ‘Data Importer’ app. This will load a new board view with the Data Importer app.
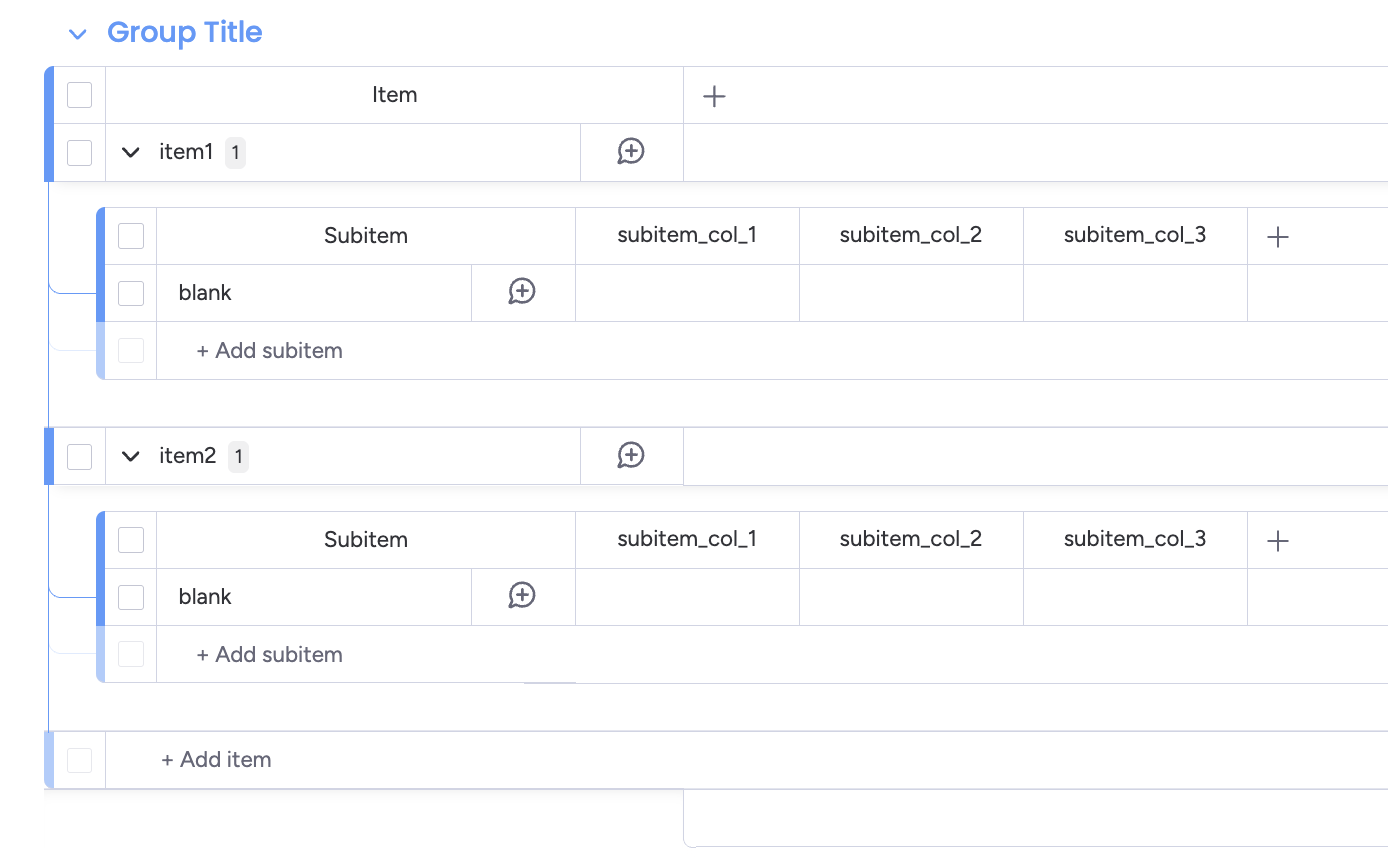
Important: add a blank subitem
In order for Data Importer to detect which items can have add sub items added to it, you'll need to add at least one subitem to your board. It can be on any item.
If your item already has subitems, you can ignore this step.
Setting up your Excel file
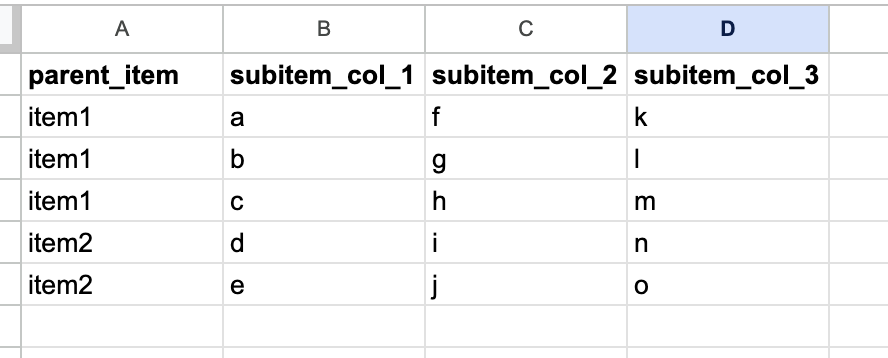
1. Because we'll be mapping subitems to parent items using the Excel file, it's important that the Excel file contains a column in it with the parent item. This should be named in the exact same way as the item name in your monday.com board.
Select your Excel file
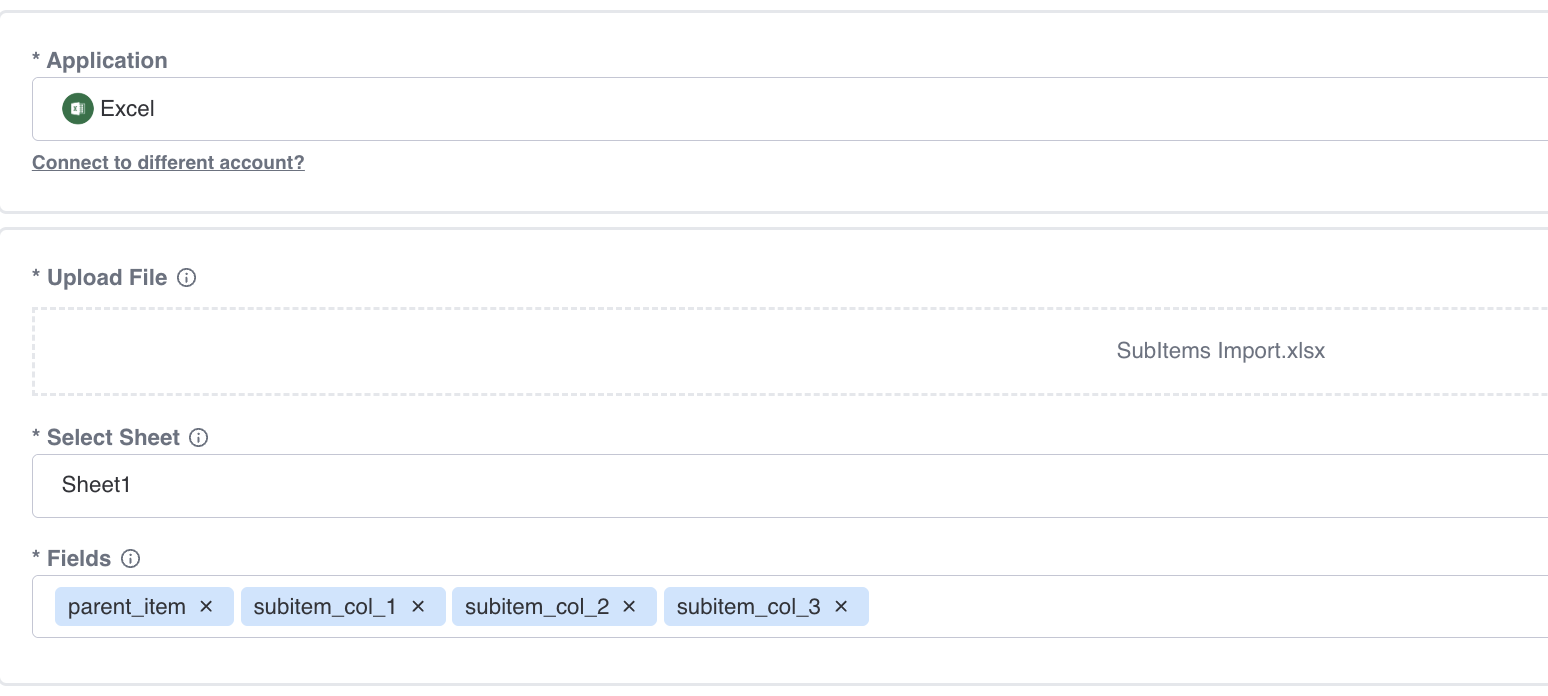
1. Select the Excel application from the dropdown list.
2. Drop in, or click to select the excel you want to import. Make sure that the file format is either .xls or .xlsx. It is also important to ensure that the field names are in the first row of your excel sheet.
3. Select the fields from your sheet that you want to import. Important: Include the parent item field in this as we'll need it for matching the subitems to the item in your monday board. It won't be imported into your subitems.
Set-up Your Integration with Excel
Now that your excel file has been uploaded, you can configure how you want it to be imported into monday.
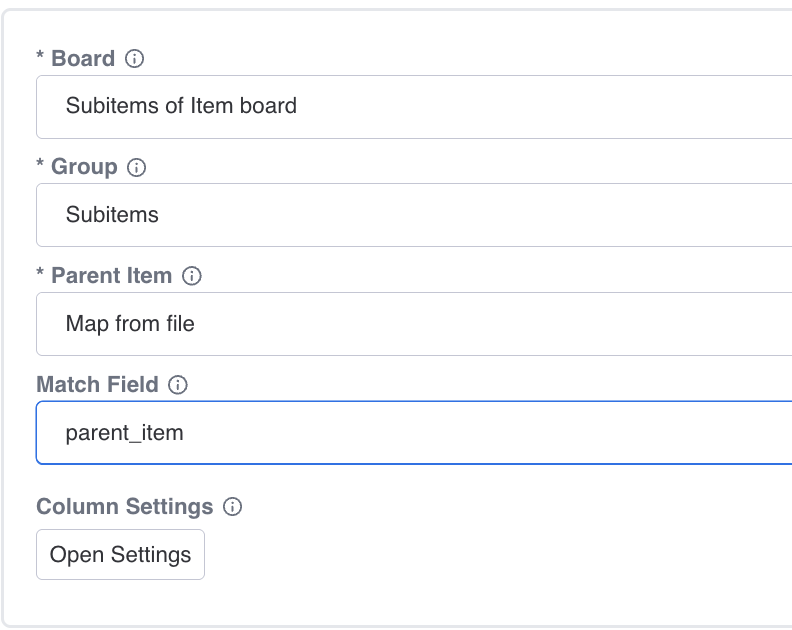
1. Select the 'Sub items' board you want to import into.
2. For the group, select 'Subitems'.
3. In parent item, select the 'Map from file' option
4. Select the parent item field from your Excel file.
Optional: Map Columns to your Monday Board
If you want to map your excel columns to existing subitem columns, follow the below steps:
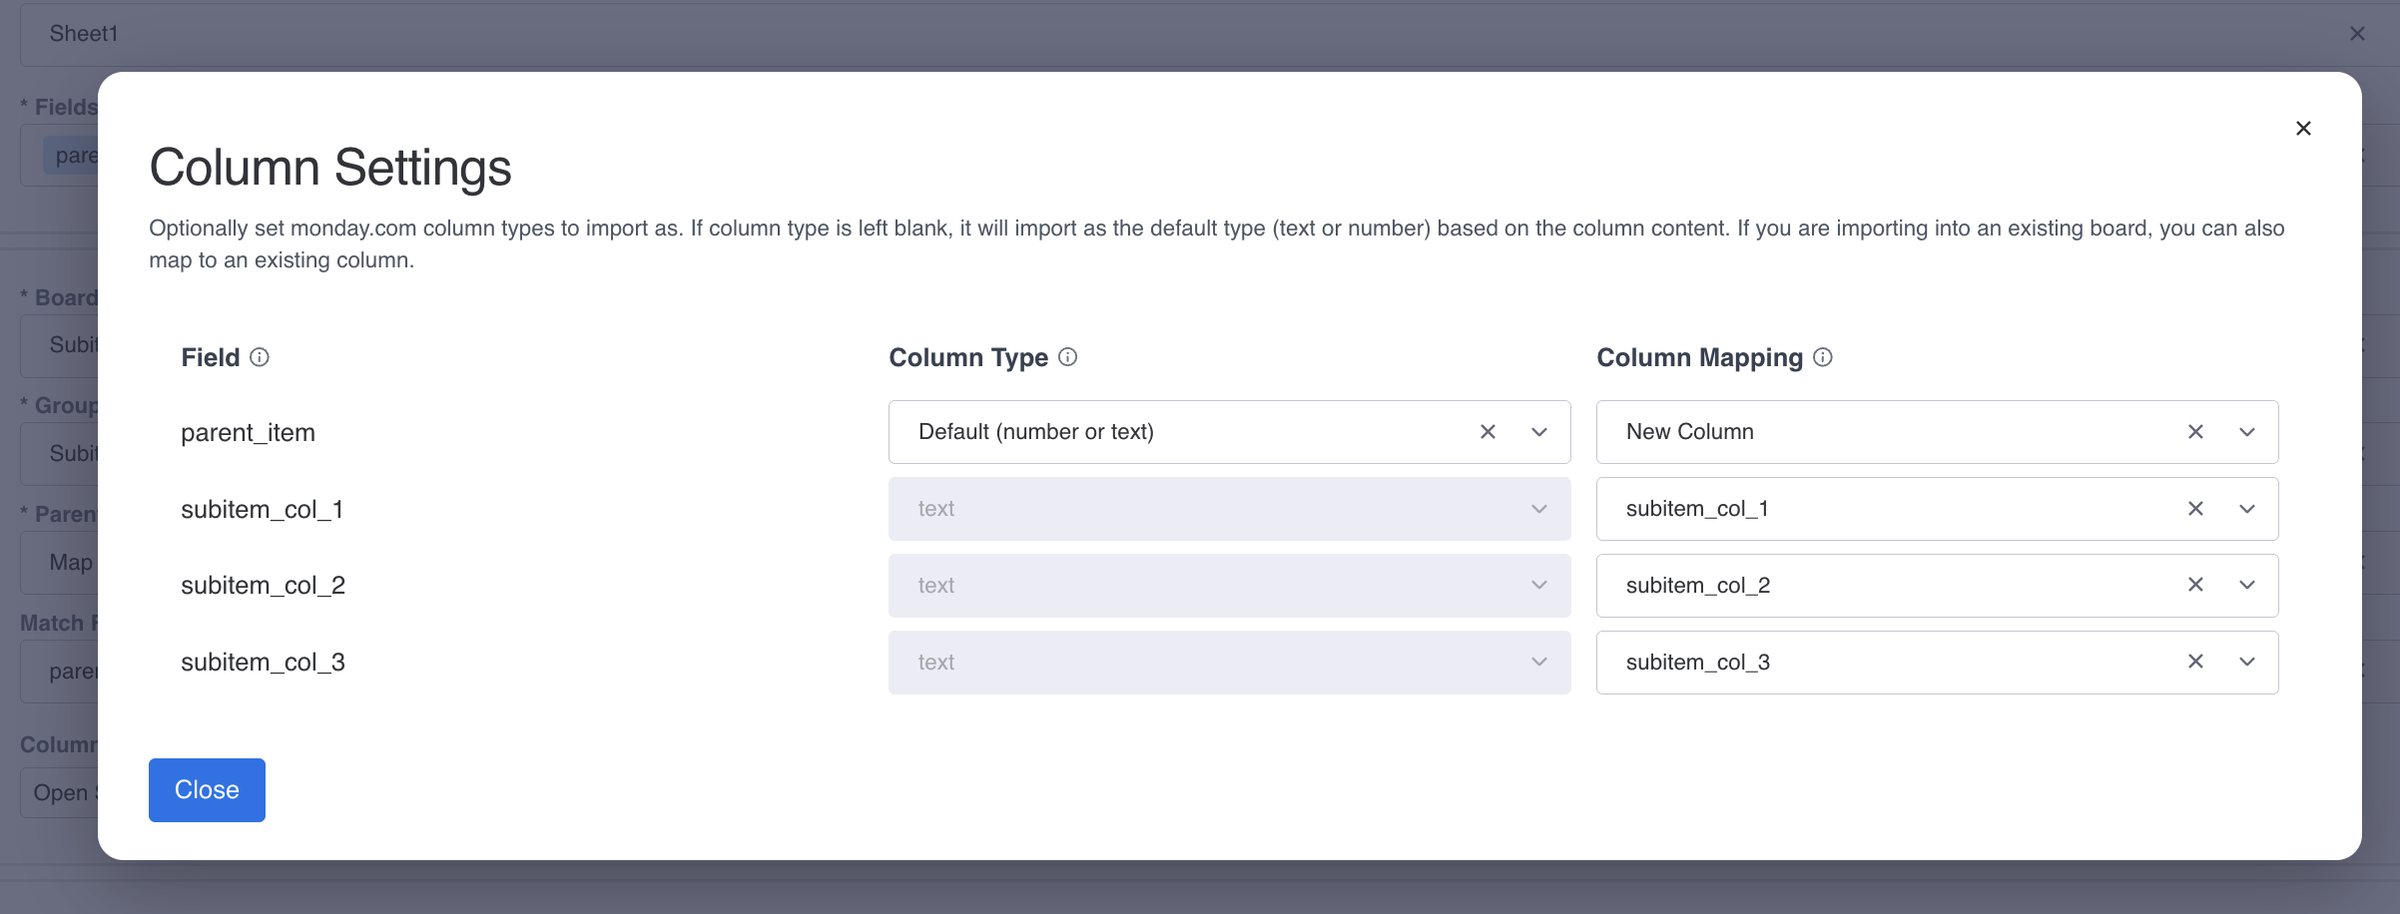
1. Click on the column settings button to open the modal.
2. In the 'Column Mapping' section, you can select the columns from your existing monday board that you want to map your Excel columns to. Data Importer will automatically set the column type to the type of the existing column.
3. You don't need to map the parent item, as it will be removed from the subitems during the import anyway.
View Your Data
1. Once you’ve filled out all the required fields, press the blue Run button.
2. For large imports, Data Importer will run these in the background so that you can close the view and continue with your other tasks.
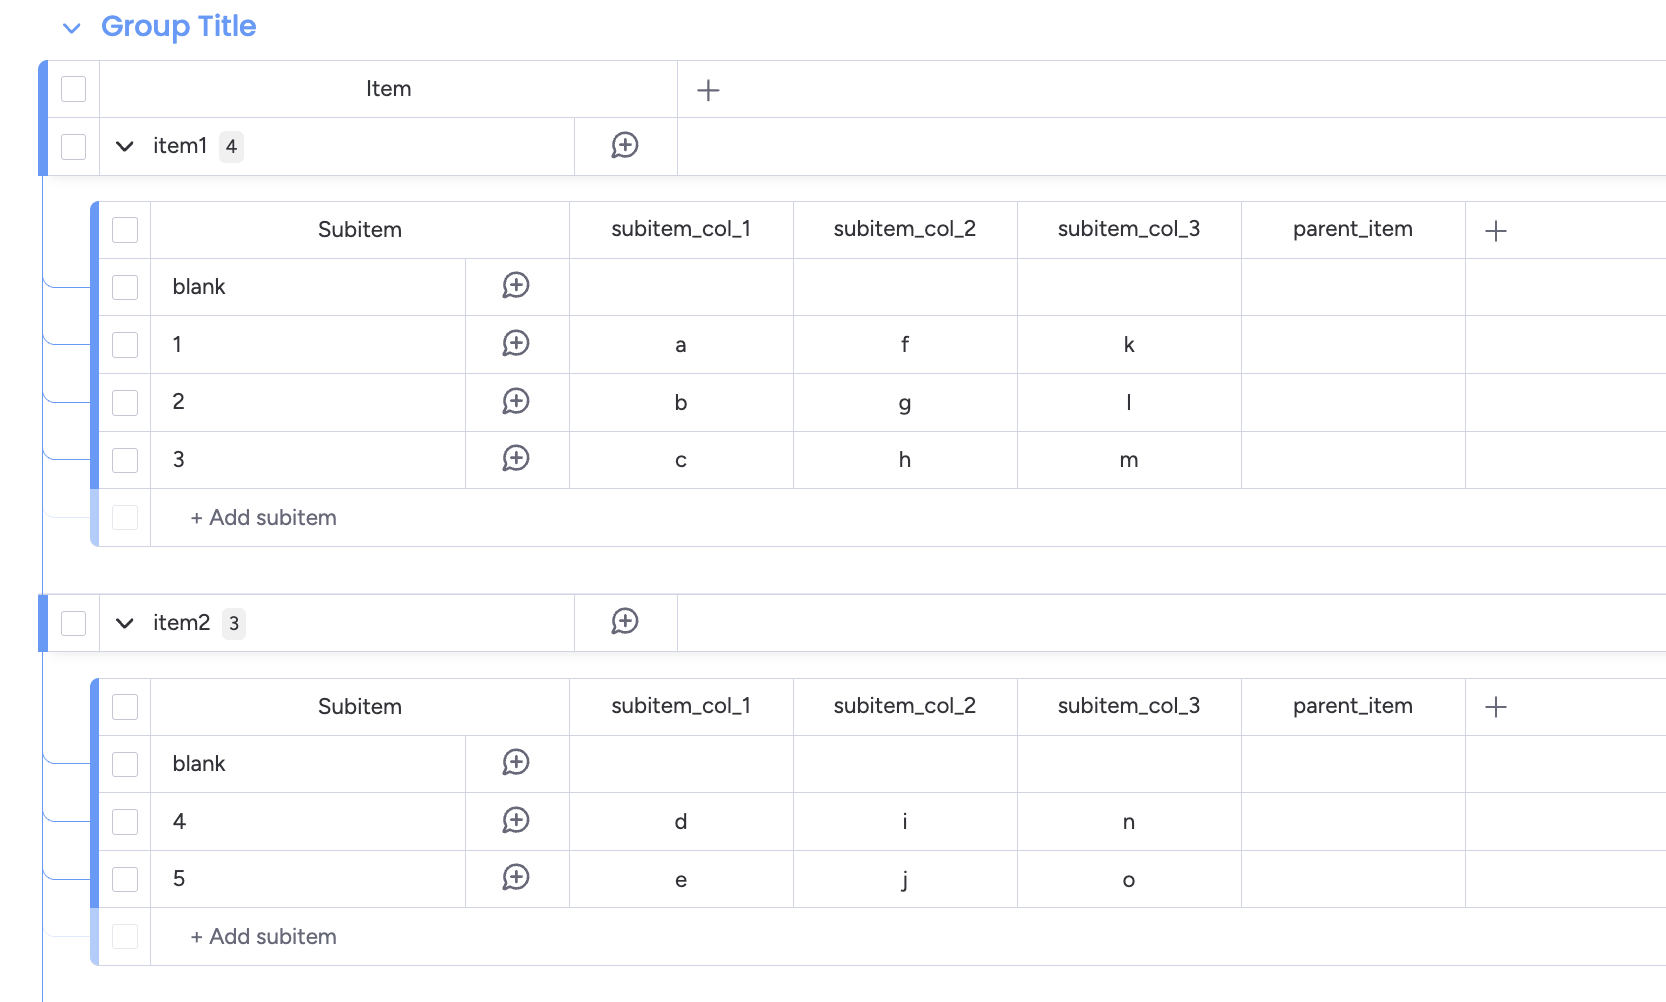
3. Once you've opened your import, you'll be able to see your new board that contains all your imported items and columns.
4. If your import exceeds the item limit, Data Importer will automatically create a new board for you and continue your import into this board.
Automatically sync your data with your monday.com board
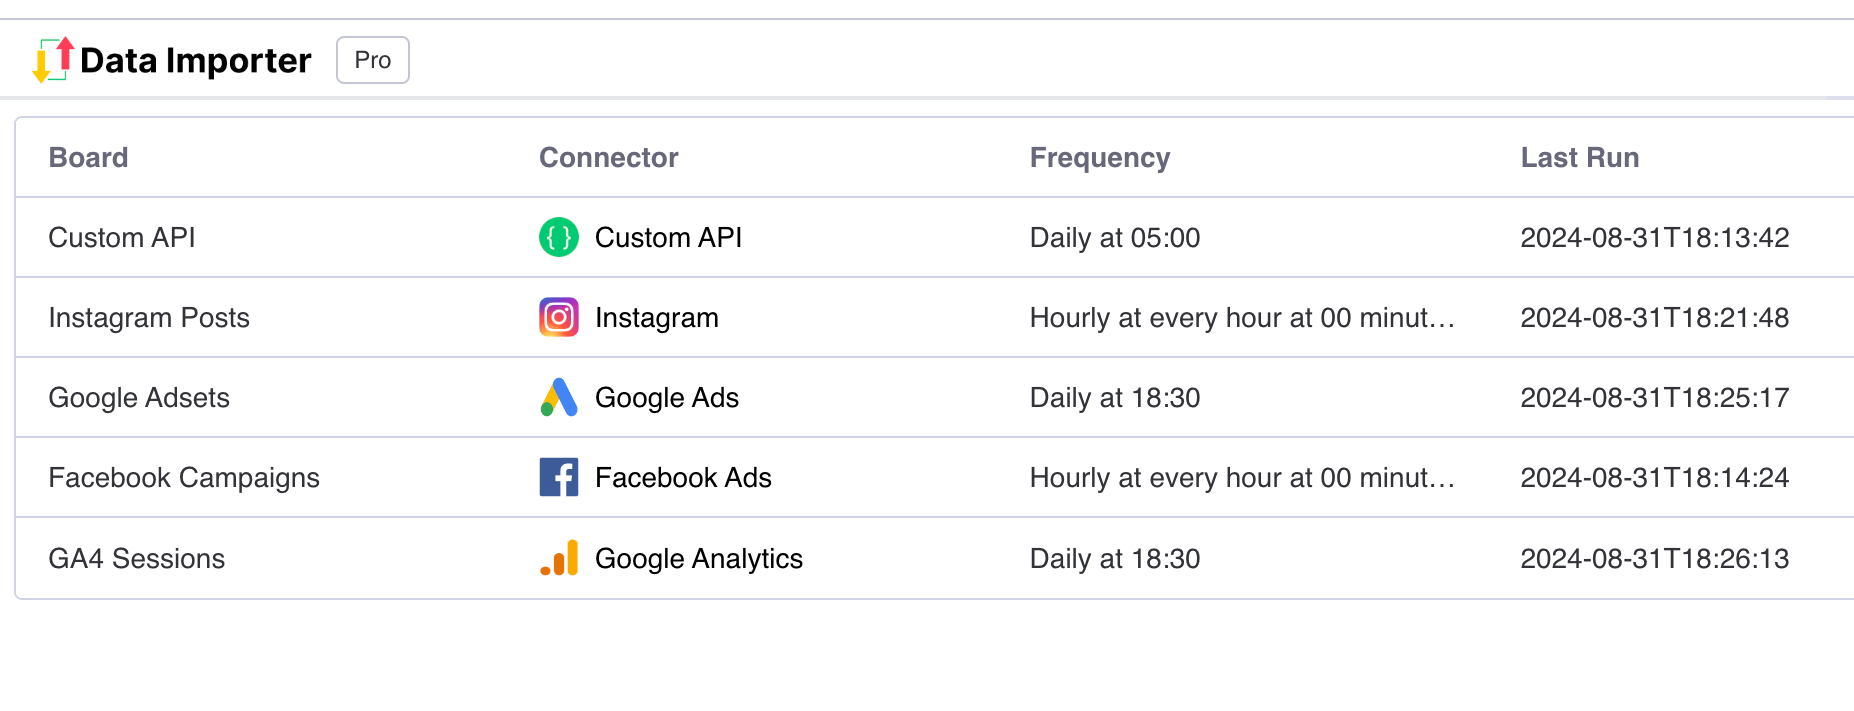
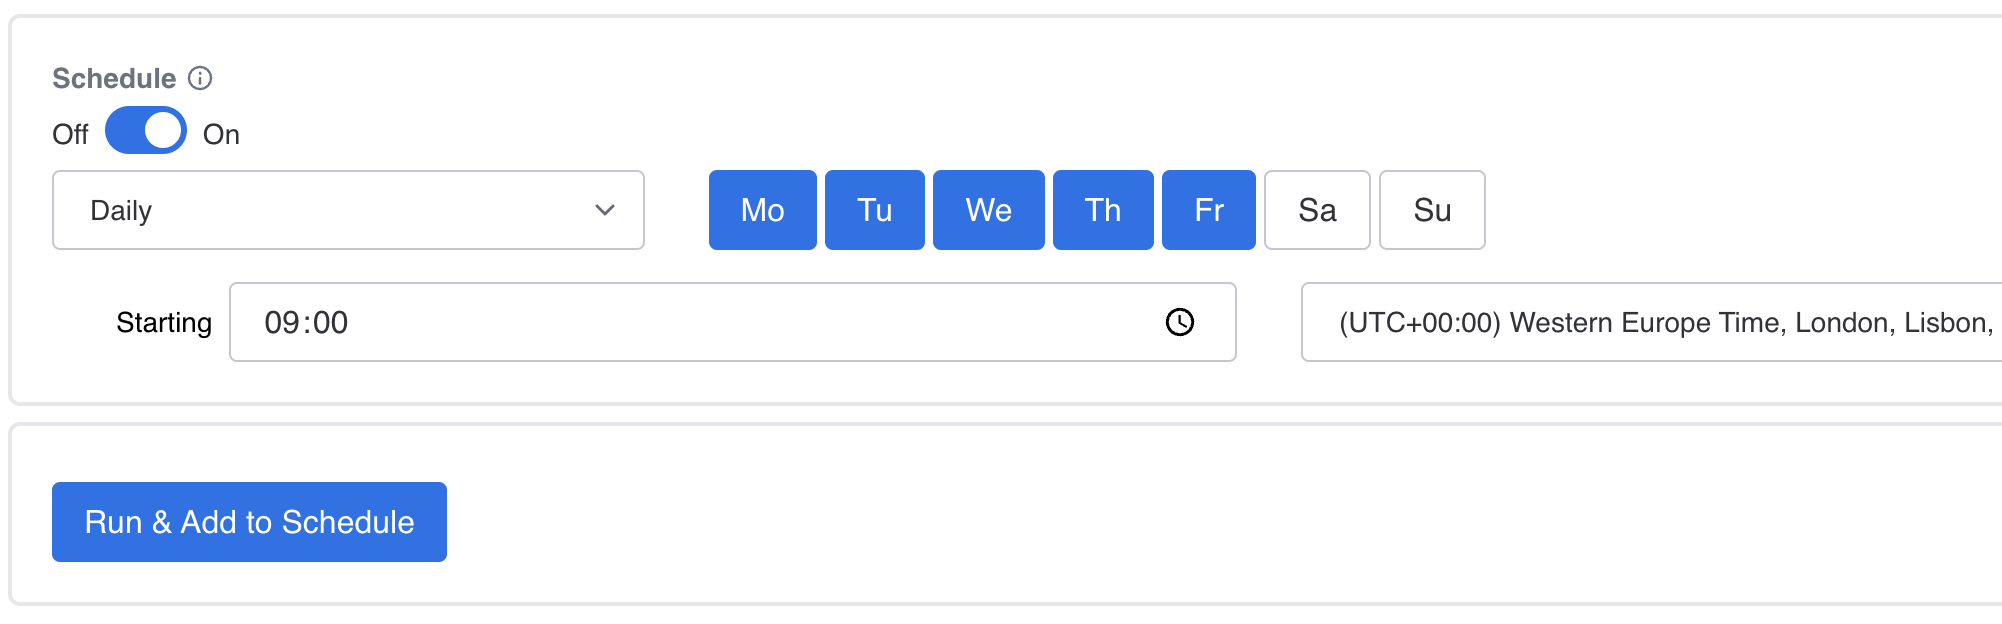
Now that you know how to import an Excel file into a monday subitems, you can automate your imports by using Data Importer's scheduler. This means your boards will automatically refresh with the latest data, even when you're offline or not signed into monday.com
You can customise the schedule by frequency, days of import, time and timezone.
Note to use the scheduler for excel files, you first need to convert and use your Excel file as a Google Sheet or use the Excel Sharepoint version.
You can view all your scheduled imports in one table from all of your applications.